KodeFile Enterprise – Quick Start
> Admin Guide: Quick Start · Main-Circle · Inner-Circle
Step 1: Launch Admin Console
Enterprise Owners and Admins can launch the Admin Console from the KodeFile Main Menu.
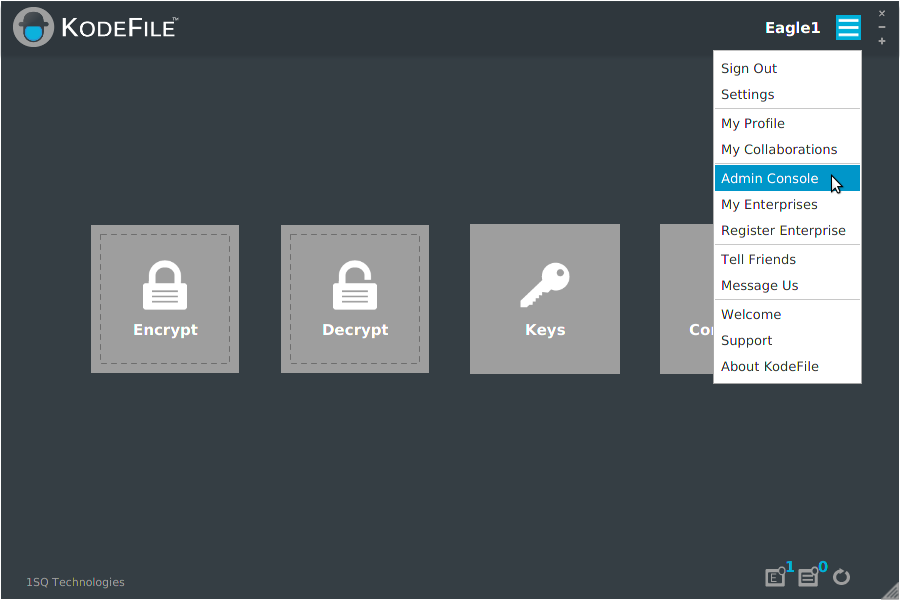
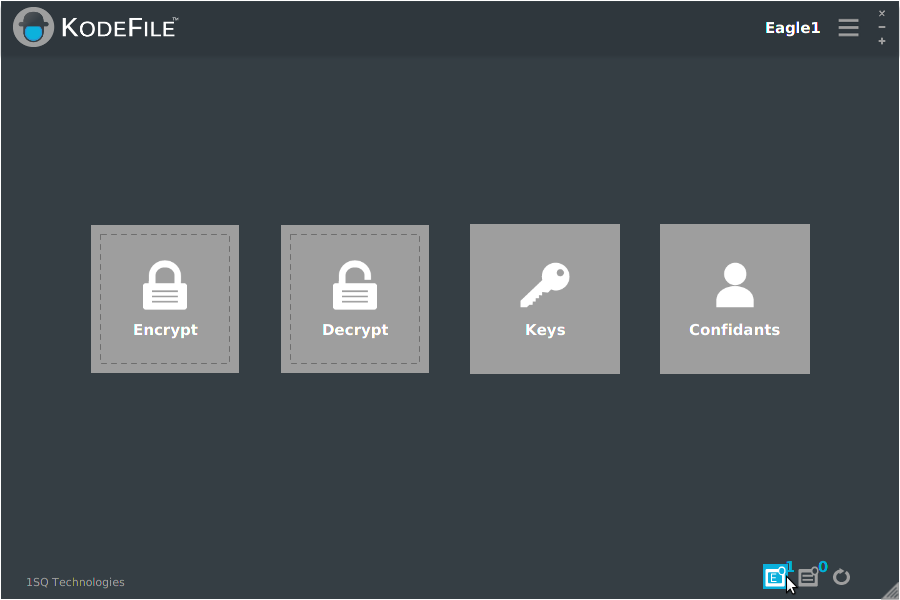
Enterprise Owners and Admins can also launch the Admin Console by clicking on the Enterprise Notifications icon.
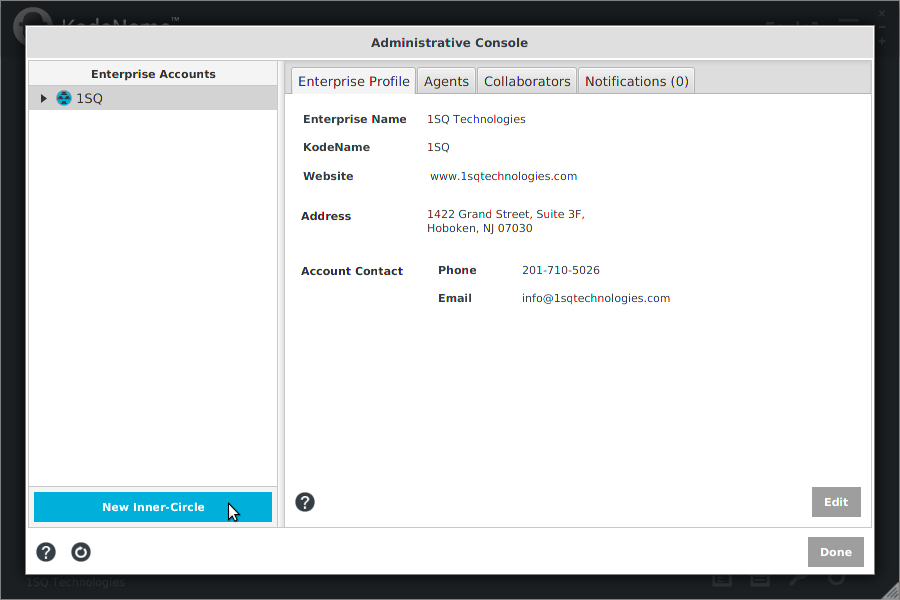
Step 2: Admin Console Layout
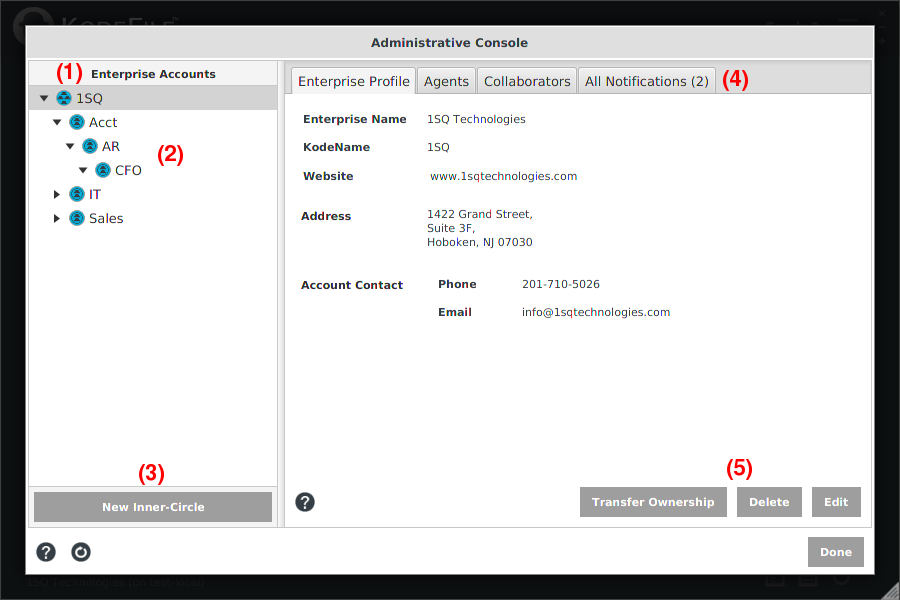
(1) Enterprise Account Tree: Displays all the Enterprise Accounts for which you have Owner or Admin role privileges. The top node of each tree is the Main-Circle which is automatically created for you upon account registration. The Main-Circle contains every Agent of your Enterprise.
(2) Inner-Circles: Displays the hierarchical Inner-Circles of your Enterprise. Inner-Circles contain specific Agents you select to be Circle members. Review the Enterprise Circles reference guide.
(3) New Inner-Circle Button: To create a new Inner-Circle, select the desired parent Circle in the tree, then click the New Inner-Circle Button. The parent Circle can be either the Main-Circle or an Inner-Circle.
(4) Circle Tabs (Main-Circle and Inner-Circles):
- Profile: Contact and KodeName information for each Circle.
- Agents/Members: The membership of each Circle.
- Collaborators: Members of Inner-Circles who have decrypt-only privileges for that Circle.
- Notifications: Messages regarding membership, invitations and join requests per Circle.
(5) Circle Tab Action Buttons: Available actions per Circle Tabs (Edit, Delete, Add, etc.).
Step 3: Add Agents to Your Enterprise
Invite any KodeFile member to become an Agent of your Enterprise. You must have a personal account to be an Agent, so instruct your work force to join KodeFile.
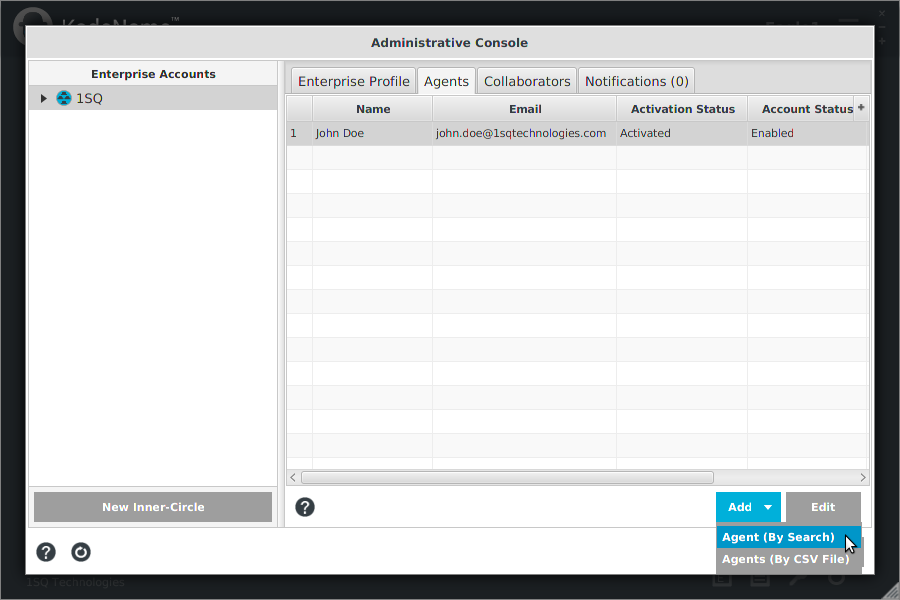
With the Main-Circle highlighted in the Account Tree, select the "Agents" tab and click "Add".
• Add Agent (By Search): Search by Full Name, Email Address or KodeName. Click on a search result to view its details. Click "Add Agent".
• Add Agents (By CSV File): To add multiple Agents at a time, upload a CSV file with columns: "FirstName" "LastName" "MI" "Email". The Email column is required.
Upon adding an Agent, an Agent Invitation is sent to the member for them to accept or deny. An Agent's Activation Status is "Pending" and Account Status is "Disabled" until they accept your Invitation.
Each member is originally added at the basic membership role of "Agent". Assign "Admin" and "Owner" roles as necessary. There must be one Owner of the Enterprise at all times. Owners have full administrative rights. Admins have full administrative rights less making any changes to Owners, deleting themselves or changing their own roles/status. Agents have no administrative rights.
Note: From the Notifications-Invitations Tab you can invite non-members to join KodeFile. Upon enrollment, they can be invited to become an Agent.
Review the Main-Circle Guide for details on administering your Enterprise Profile and Agents.
Step 4: Create Inner-Circles and Add Circle Members
With the Main-Circle highlighted in the Account Tree, click the "New Inner-Circle" button.
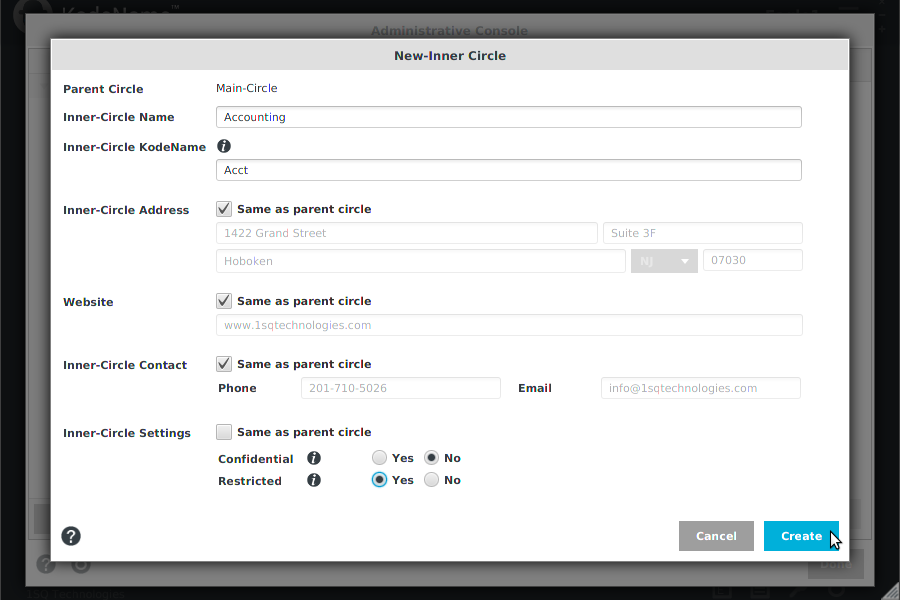
Enter the Inner-Circle's profile information and choose its Confidential and Restricted Settings. Click "Create".
• Restricted Inner-Circles limit use of their Circles keys to members only. Sharing keys with any member outside the Circle is prohibited.
• Confidential Inner-Circles are known only to the members of their Enterprise. They are not searchable and KodeFile members cannot share keys with them.
Add Circle Members
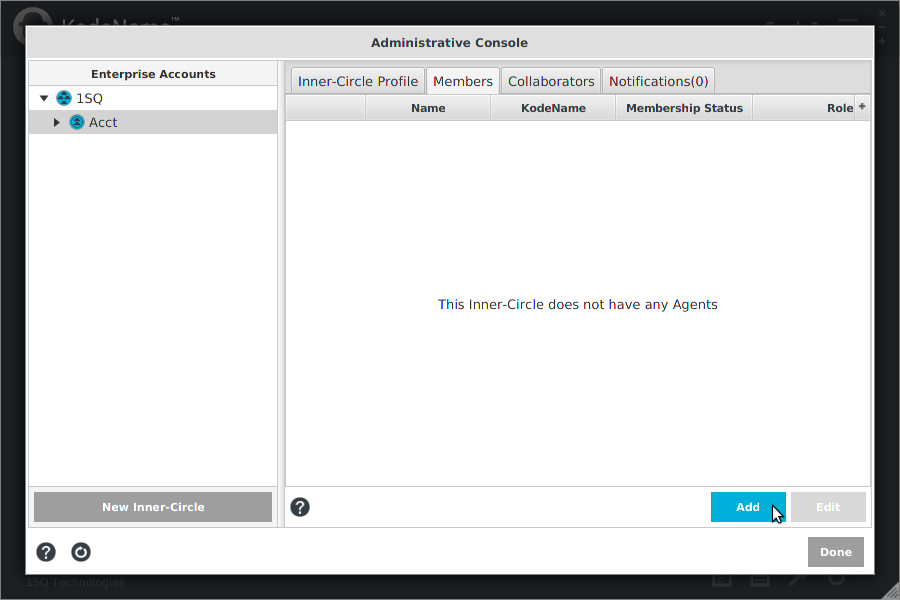
To add Circle Members, with the Inner-Circle selected in the Account Tree, select the "Members" tab and click "Add".
• Select from the list of Agents (Ctrl/Shift + Click to select multiple) and click "Add".
Agents are automatically added to the Inner-Circle membership; they do not need to accept or deny the membership.
Agents can request to join an Inner-Circle from "My Enterprises" in the Main Menu. Admins or Owners can then grant or deny the request from the Circle Notifications tab.
Hierarchical Inner-Circles
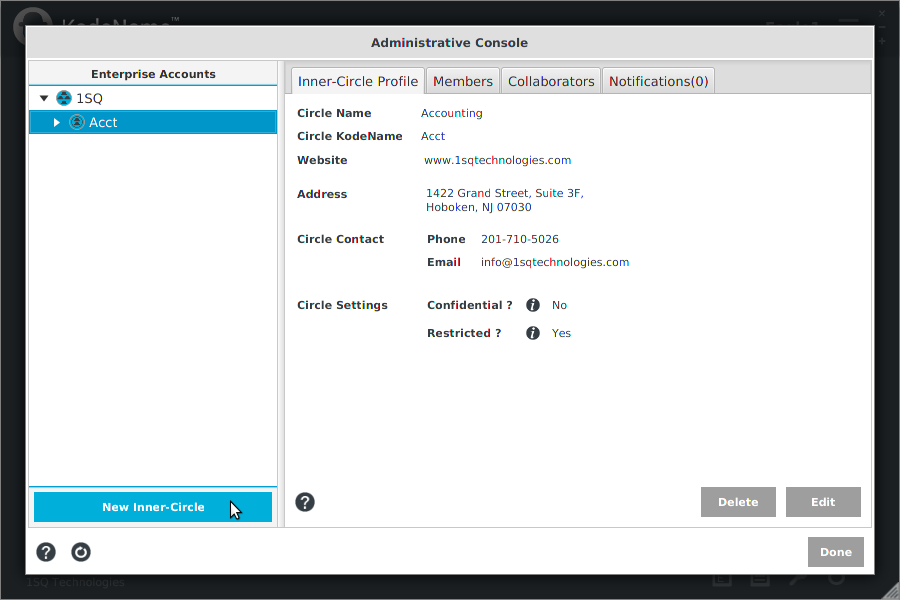
To create a nested Inner-Circle, highlight the desired parent Inner-Circle in the directory tree and click the "New Inner-Circle" button.
• Enter the Inner-Circle's profile information and choose its Confidential and Restricted Settings. Click "Create".
• With the Inner-Circle selected in the Account Tree, select the "Members" tab and click "Add". Select from the list of Agents and click "Add".
Note: When adding members to a nested Inner-Circle, if that Agent is not a member of the parent Inner-Circle, they will automatically be added to all Inner-Circles in the hierarchy. For example, if your Inner-Circles are nested IC1 > IC1-1 > IC1-1-1, any Agent added to IC1-1-1 will automatically be added to IC1-1 and IC1.
Review the Inner-Circle Guide for details on administering your Inner-Circles and Circle Members.
Step 5: Educate Your Agents
When your Agents encrypt a file, they are required to designate the file's Key Owner. They must select either the Main-Circle or an Inner-Circle, of which they are a member.
Establish procedures to help Agents properly designate the Circle key ownership, as it ensures your Enterprise will always retain ownership and control of its keys.
Agents can visit www.1sqtechnologies.com/kodefile/agent101/ for a quick Agent 101 overview.