KodeFile iOS – Encrypt
> iOS Support: Encrypt · Keys & Confidants · Decrypt & Import
You can start an encryption task inside the KodeFile app or from outside (Other).
INSIDE - STEP 1
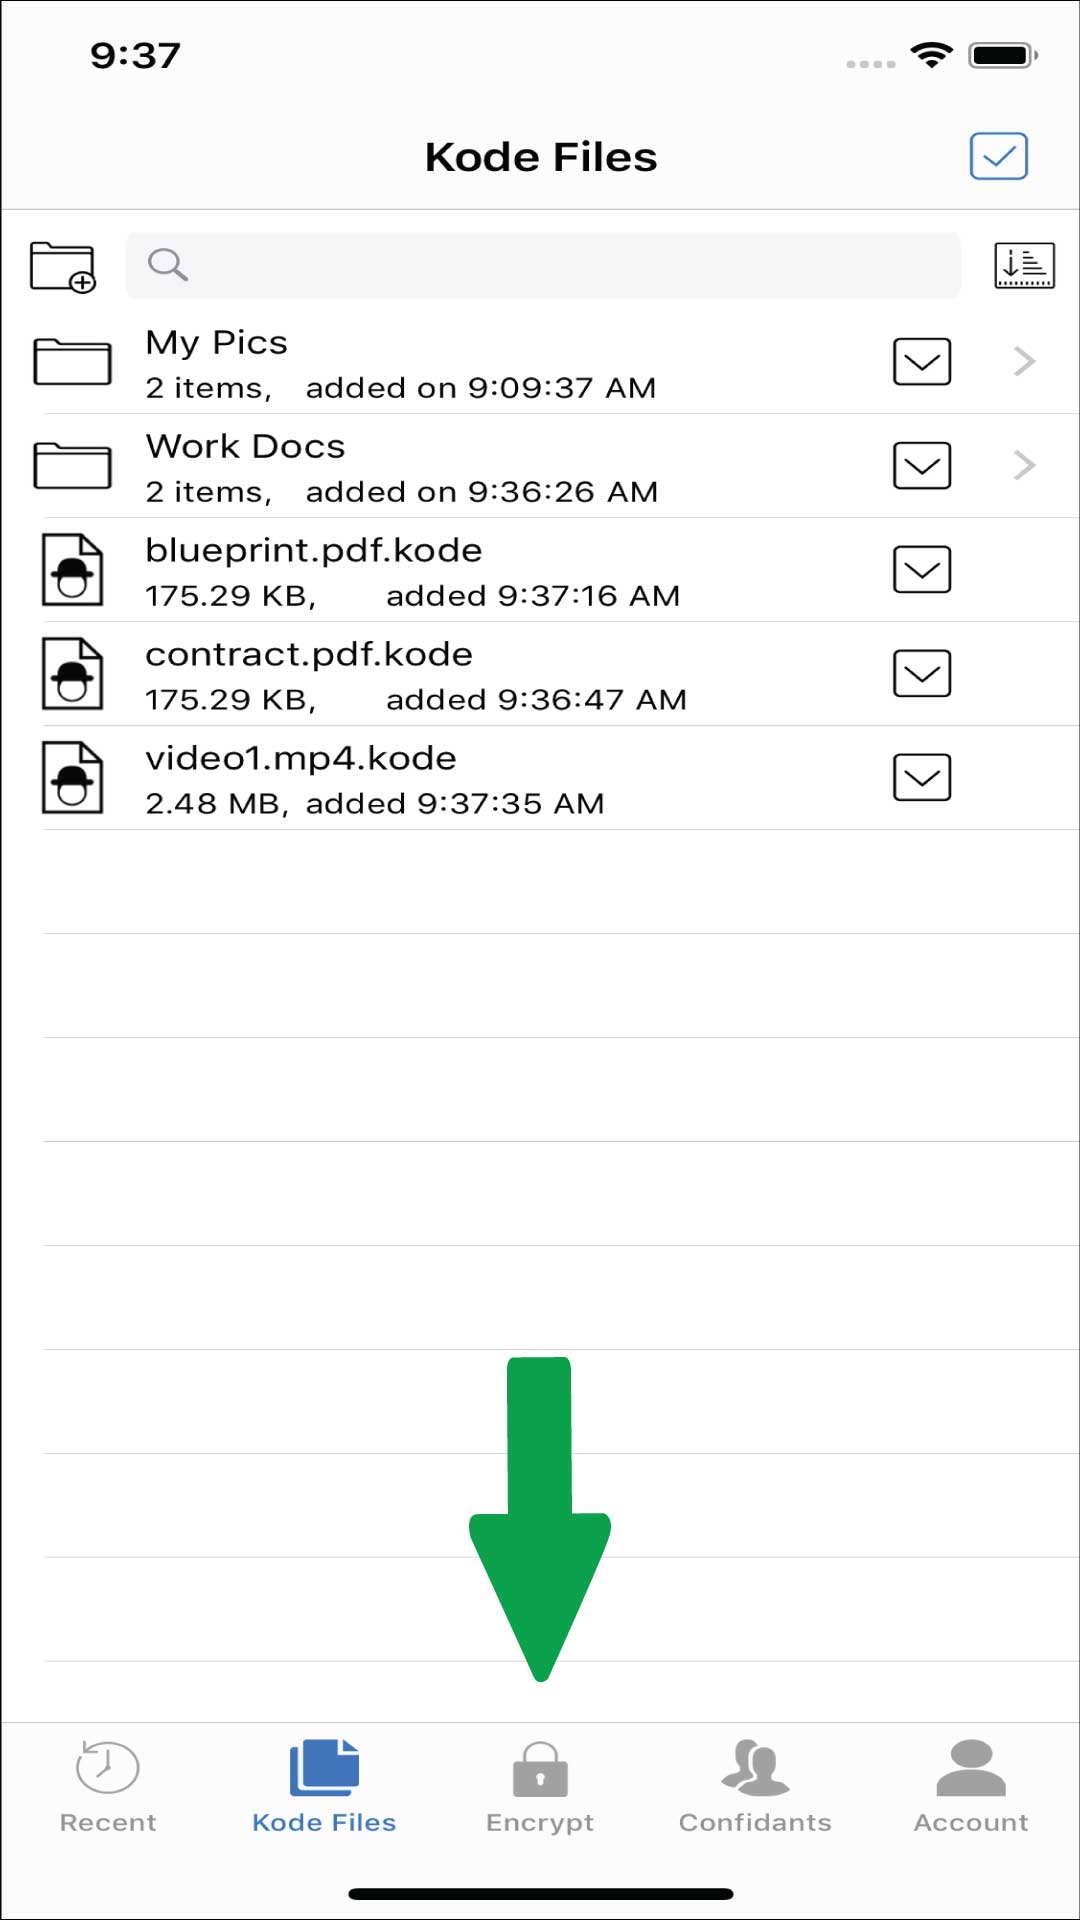
To encrypt from inside, simply press the Encrypt button on the main tool bar.
INSIDE - STEP 2
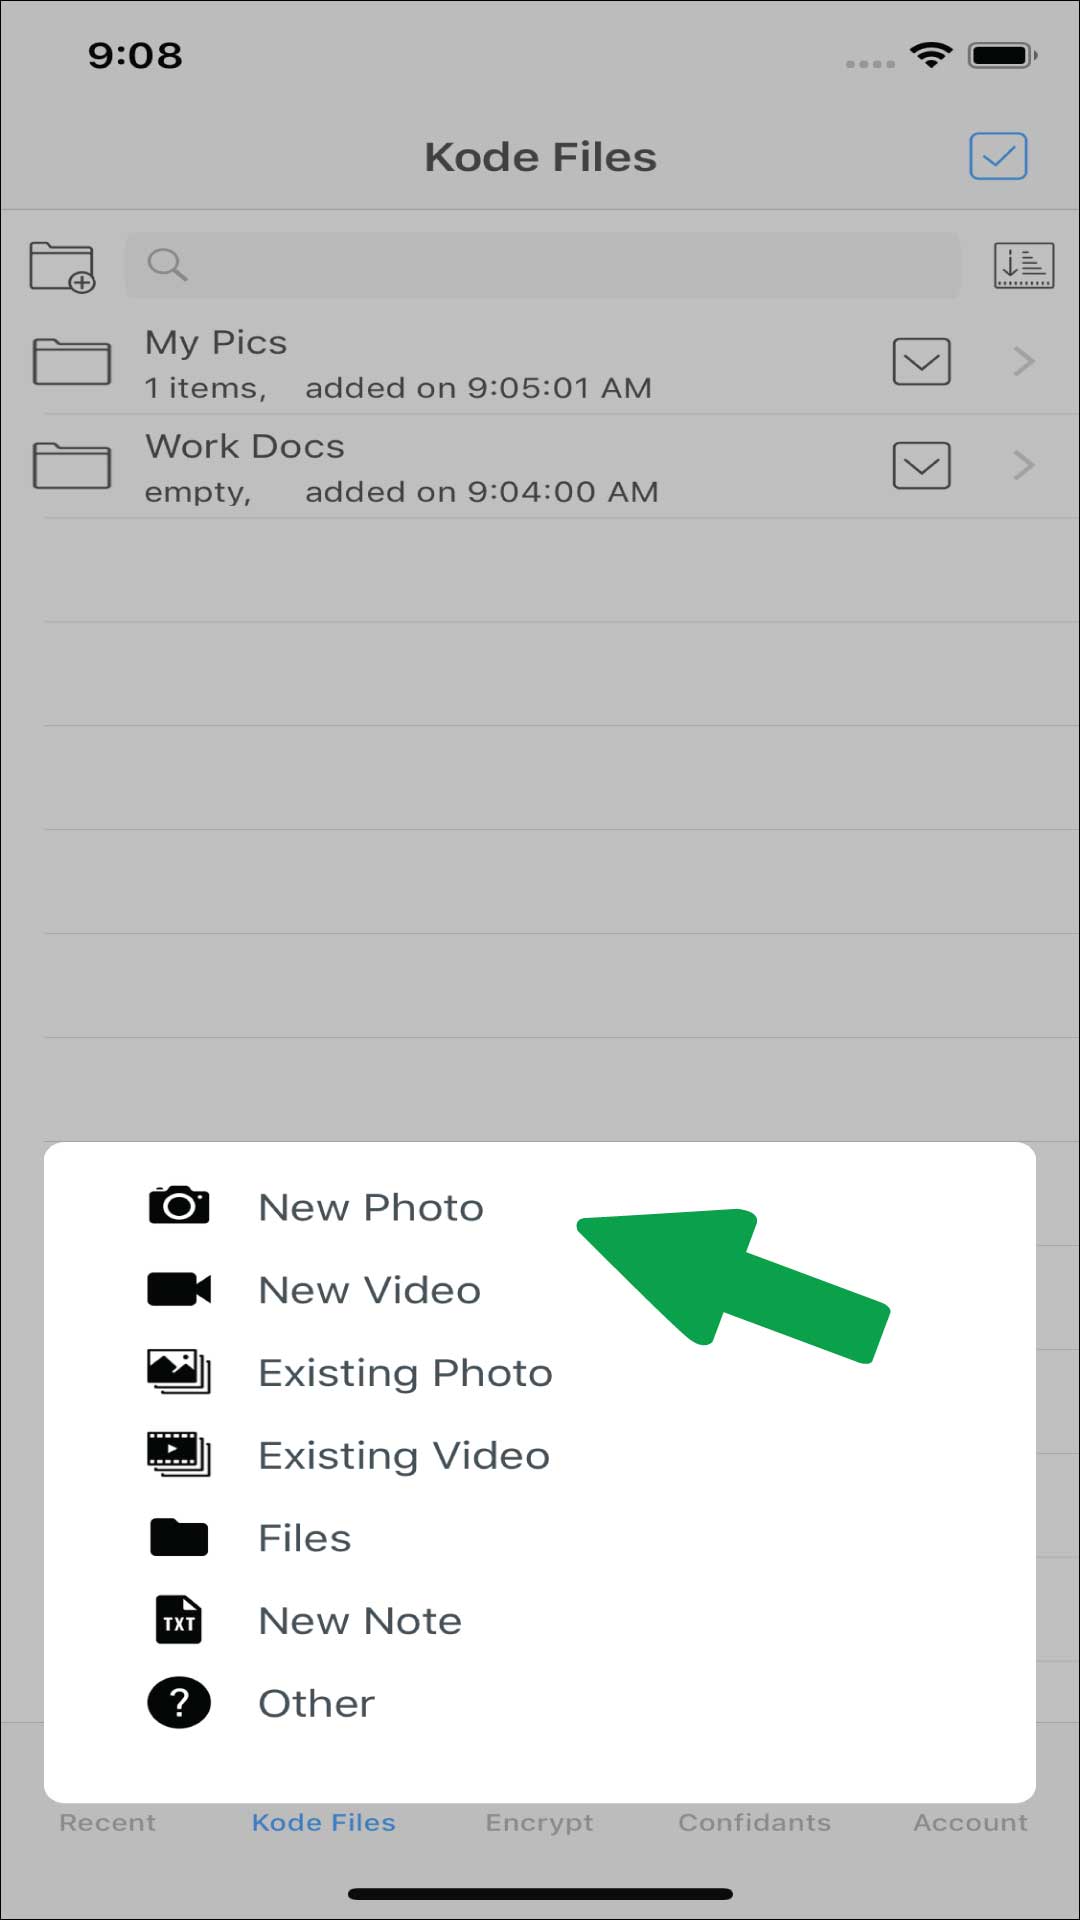
Select from the encryption menu to select your file source.
- New Photo: Launches your camera to take a new photo.
- New Video: Launches your camera to take a new video.
- Existing Photo: Launches your gallery that stores your existing photos.
- Existing Video: Launches your gallery that stores your existing videos.
- Files: Launches your files browser for navigating your internal storage areas and cloud drives. Encrypt new files or import existing .kode files.
- New Note: Launches a text editor for you to create a note that will be encrypted as a ".txt" file.
- Other - Launches encrypt support.
Depending on the file source and chosen application, you may or may not be able to select multiple files for a single encryption task. To encrypt multiple files at a time, encrypting from outside the app may be an available option. See below.
Existing files will be encrypted with their default name. You can rename them after encryption. New photo/video/note allow for you to name the file.
Any new photo or video is encrypted and saved within the KodeFile app. The new photo or video is not saved to your default gallery application.
INSIDE - STEP 3
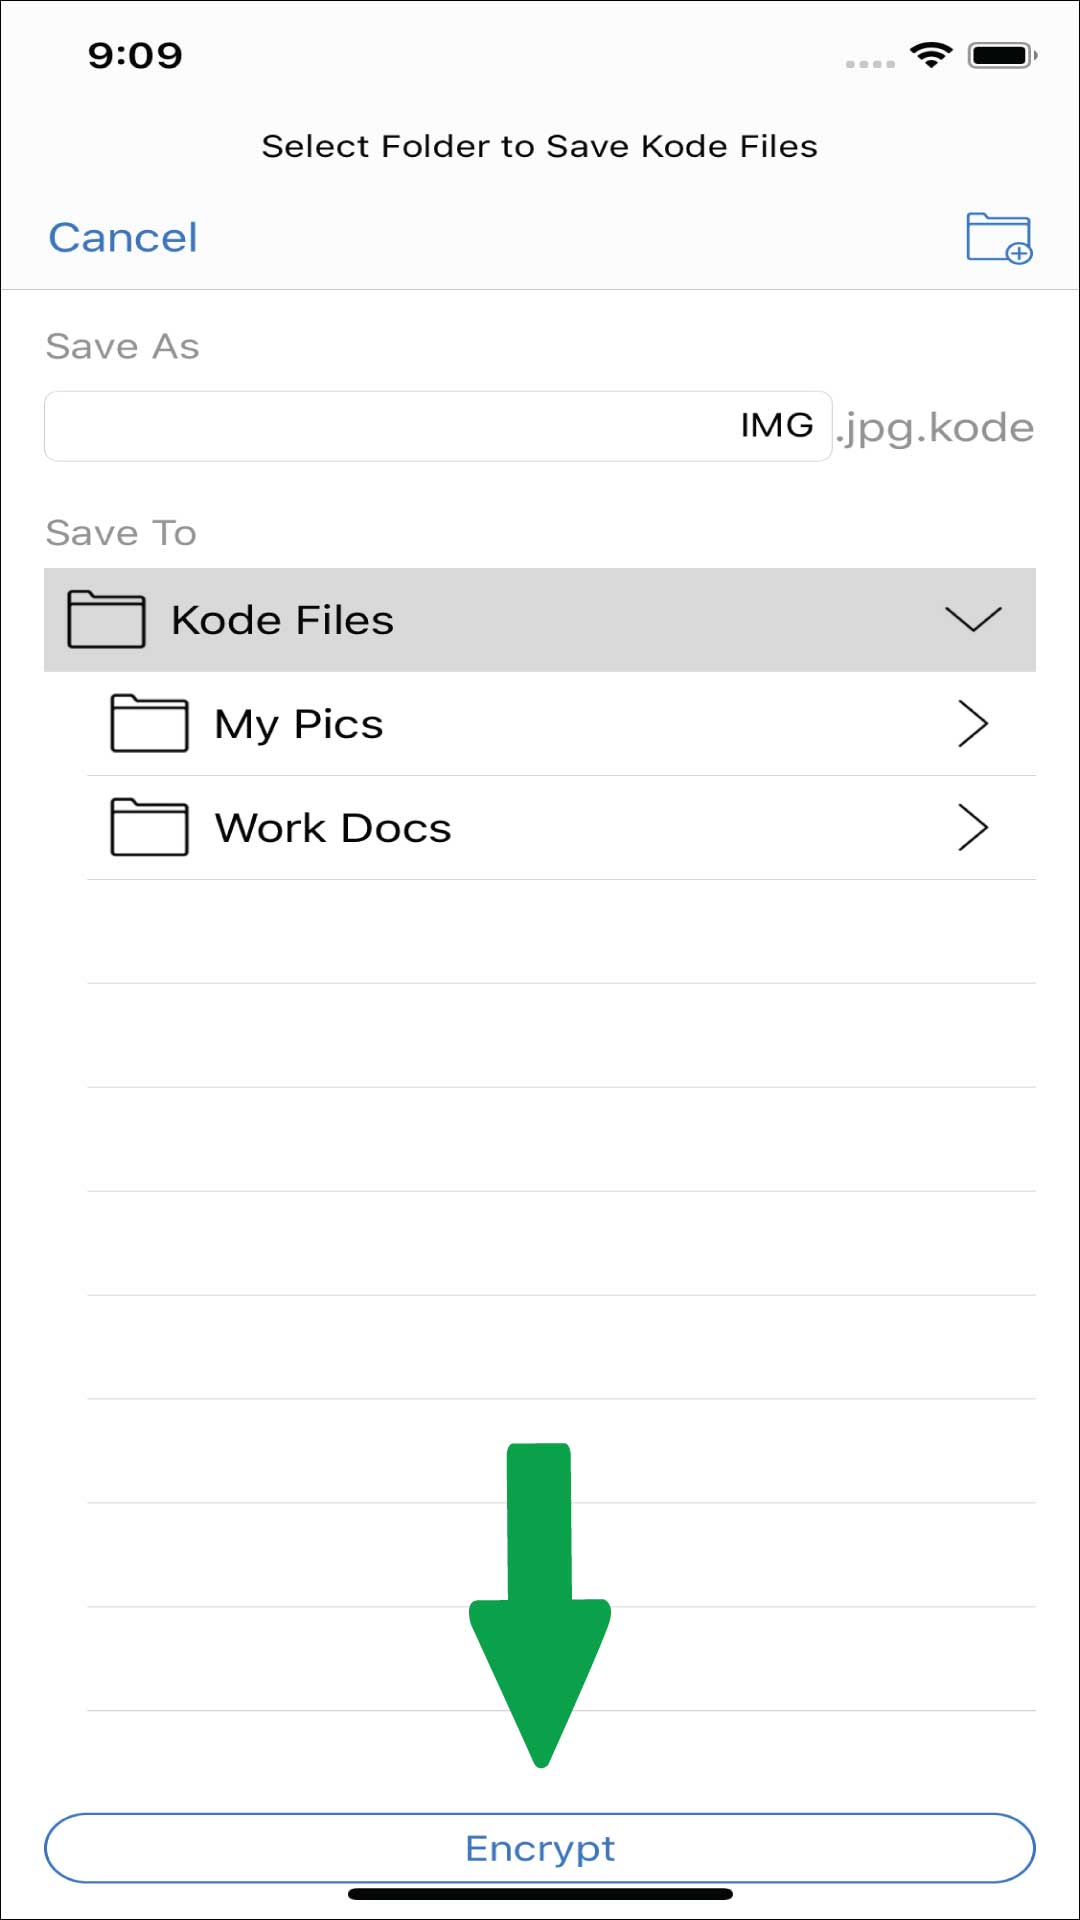
After selecting your file(s), from the KodeFile directory screen, select where you want the encrypted files to be stored locally within the app. To create a new folder or subfolder within your "Kode Files" directory, select the parent directory and select the add folder icon.
If you are encrypting a new photo/video/note, you can edit the file name or accept the default name. Press Encrypt.
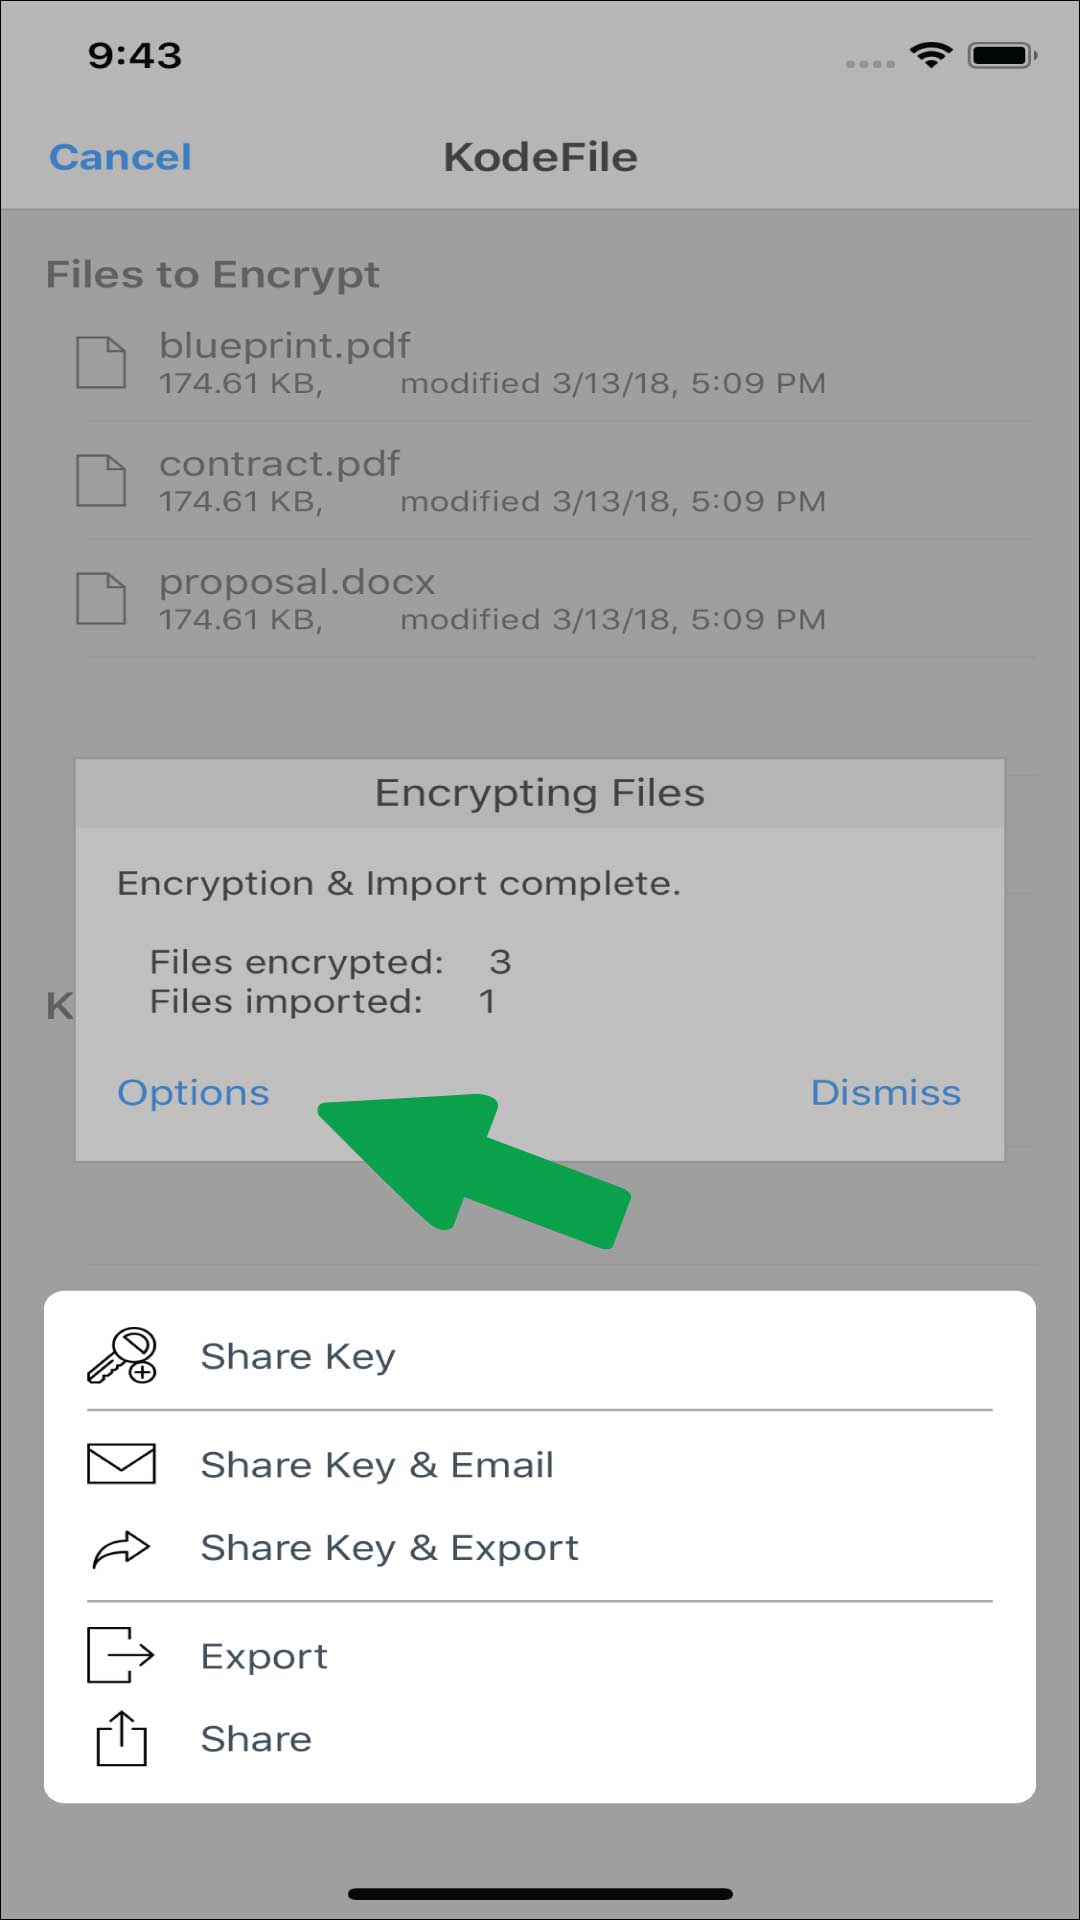
After encryption, in Options, you can take actions on the newly encrypted files or Dismiss.
- Share Key: Launches your Confidants list for selection.
- Share Key and Email: Launches your Confidants list for selection. Then launches your email app with your chosen Confidant's email addresses pre-populated and the files attached.
- Share Key and Export: Launches your Confidants list for selection. Then launches menu of available apps and locations for exporting the files (cloud, email, etc.).
- Export: Launches menu of available apps and locations for exporting the files (cloud, email, etc.).
- Share: Launches menu of available apps for sending the files (cloud, email, etc.).
Step 1
Step 2
Step 3
KodeFile iOS – Encrypt (Other)
You can encrypt files from outside the KodeFile app (Other).
Cloud Drive Apps (Google Drive, Dropbox, etc.), Photo Galleries, Email Apps, File Drawers
For this example, we will be using iCloud Drive as the file source.
Other apps/sources will follow the same steps, however some apps may not allow for selecting multiple files at a time.
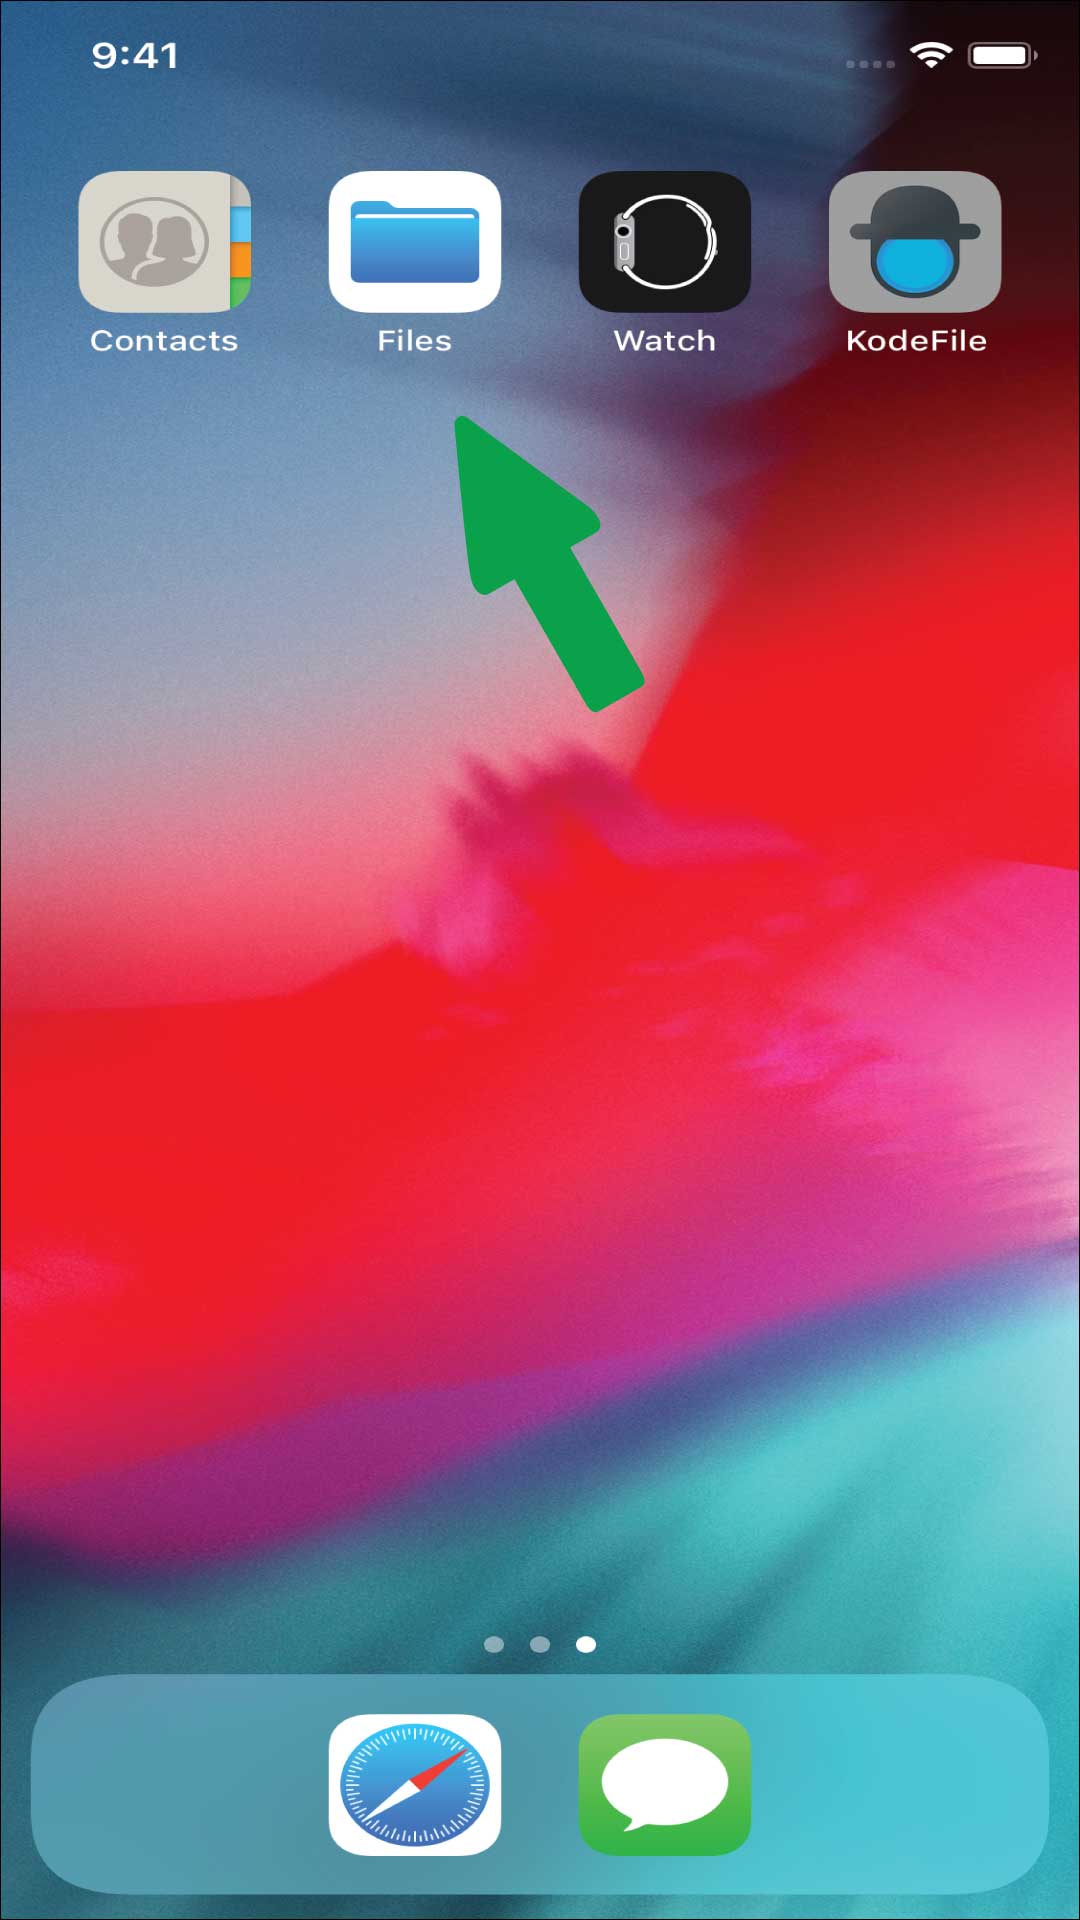
OUTSIDE - STEP 1
Launch your Files.
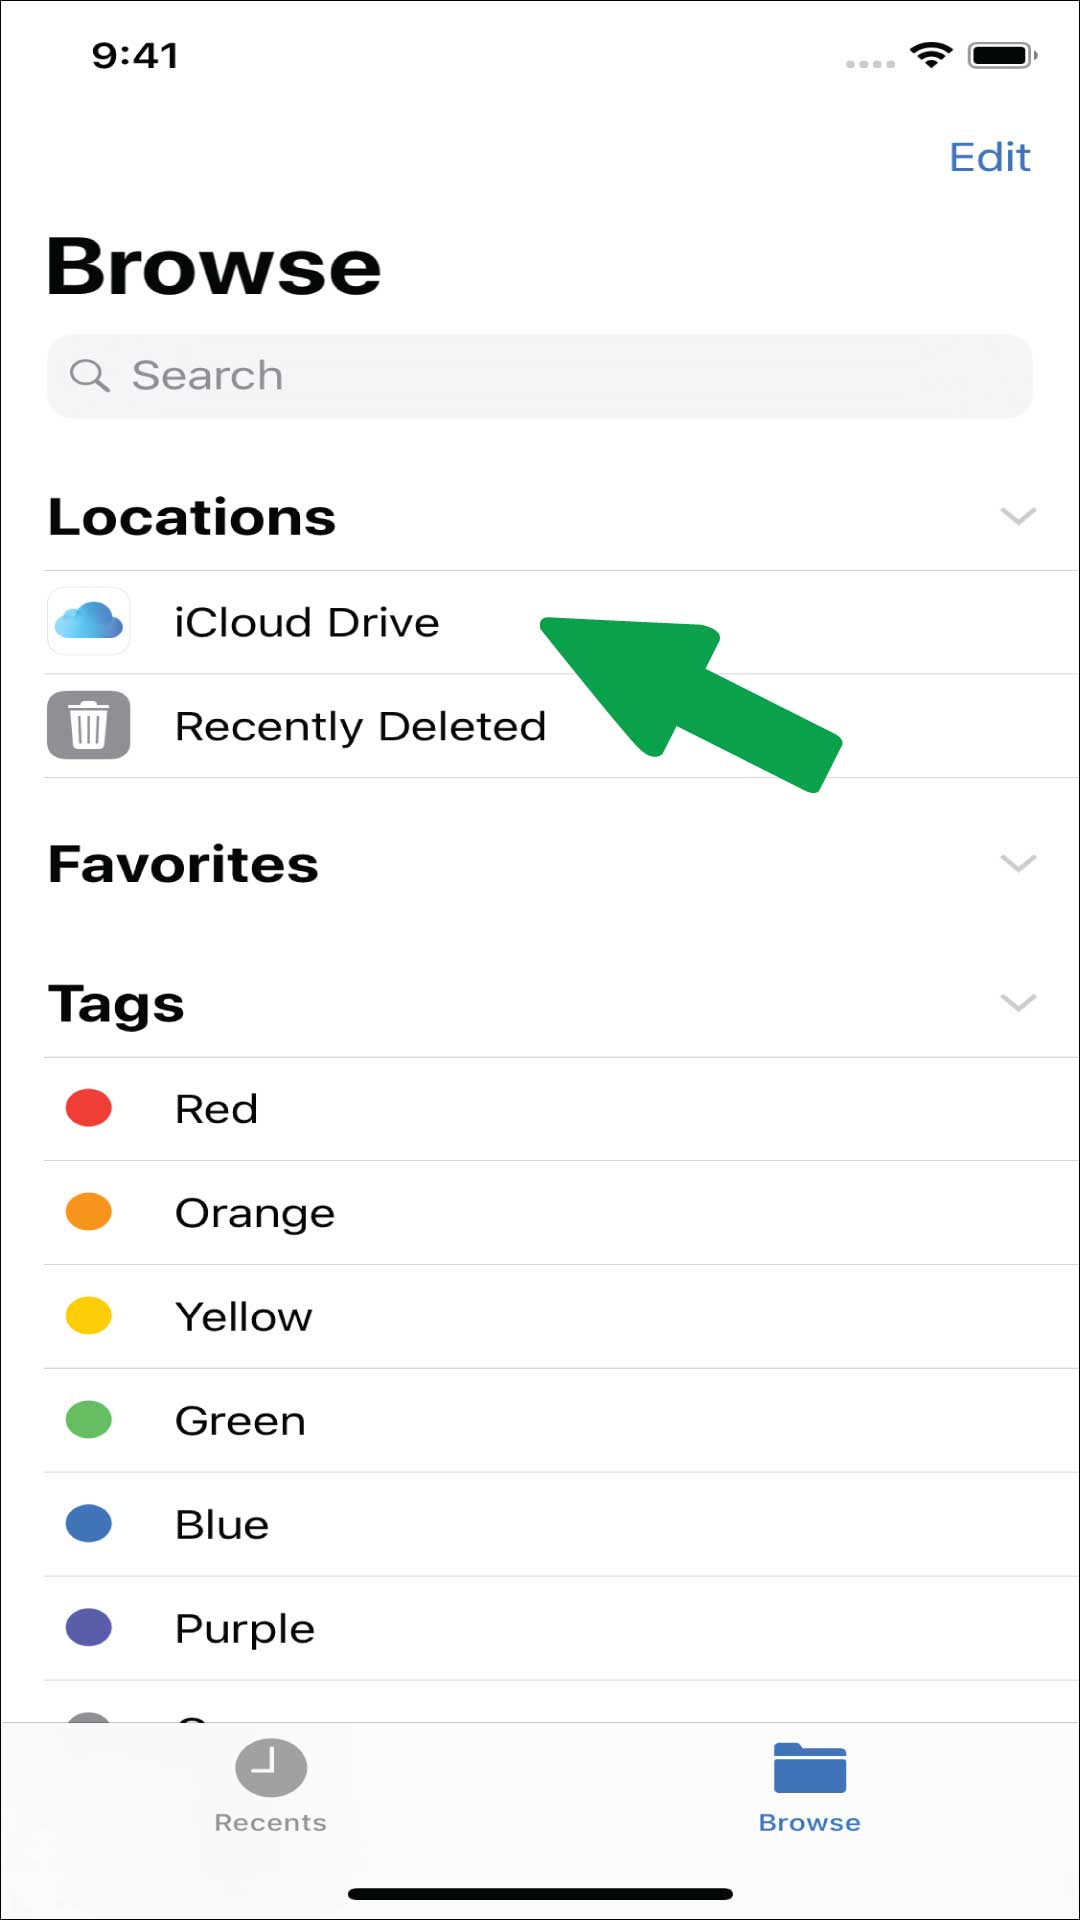
OUTSIDE - STEP 2
Launch your iCloud.
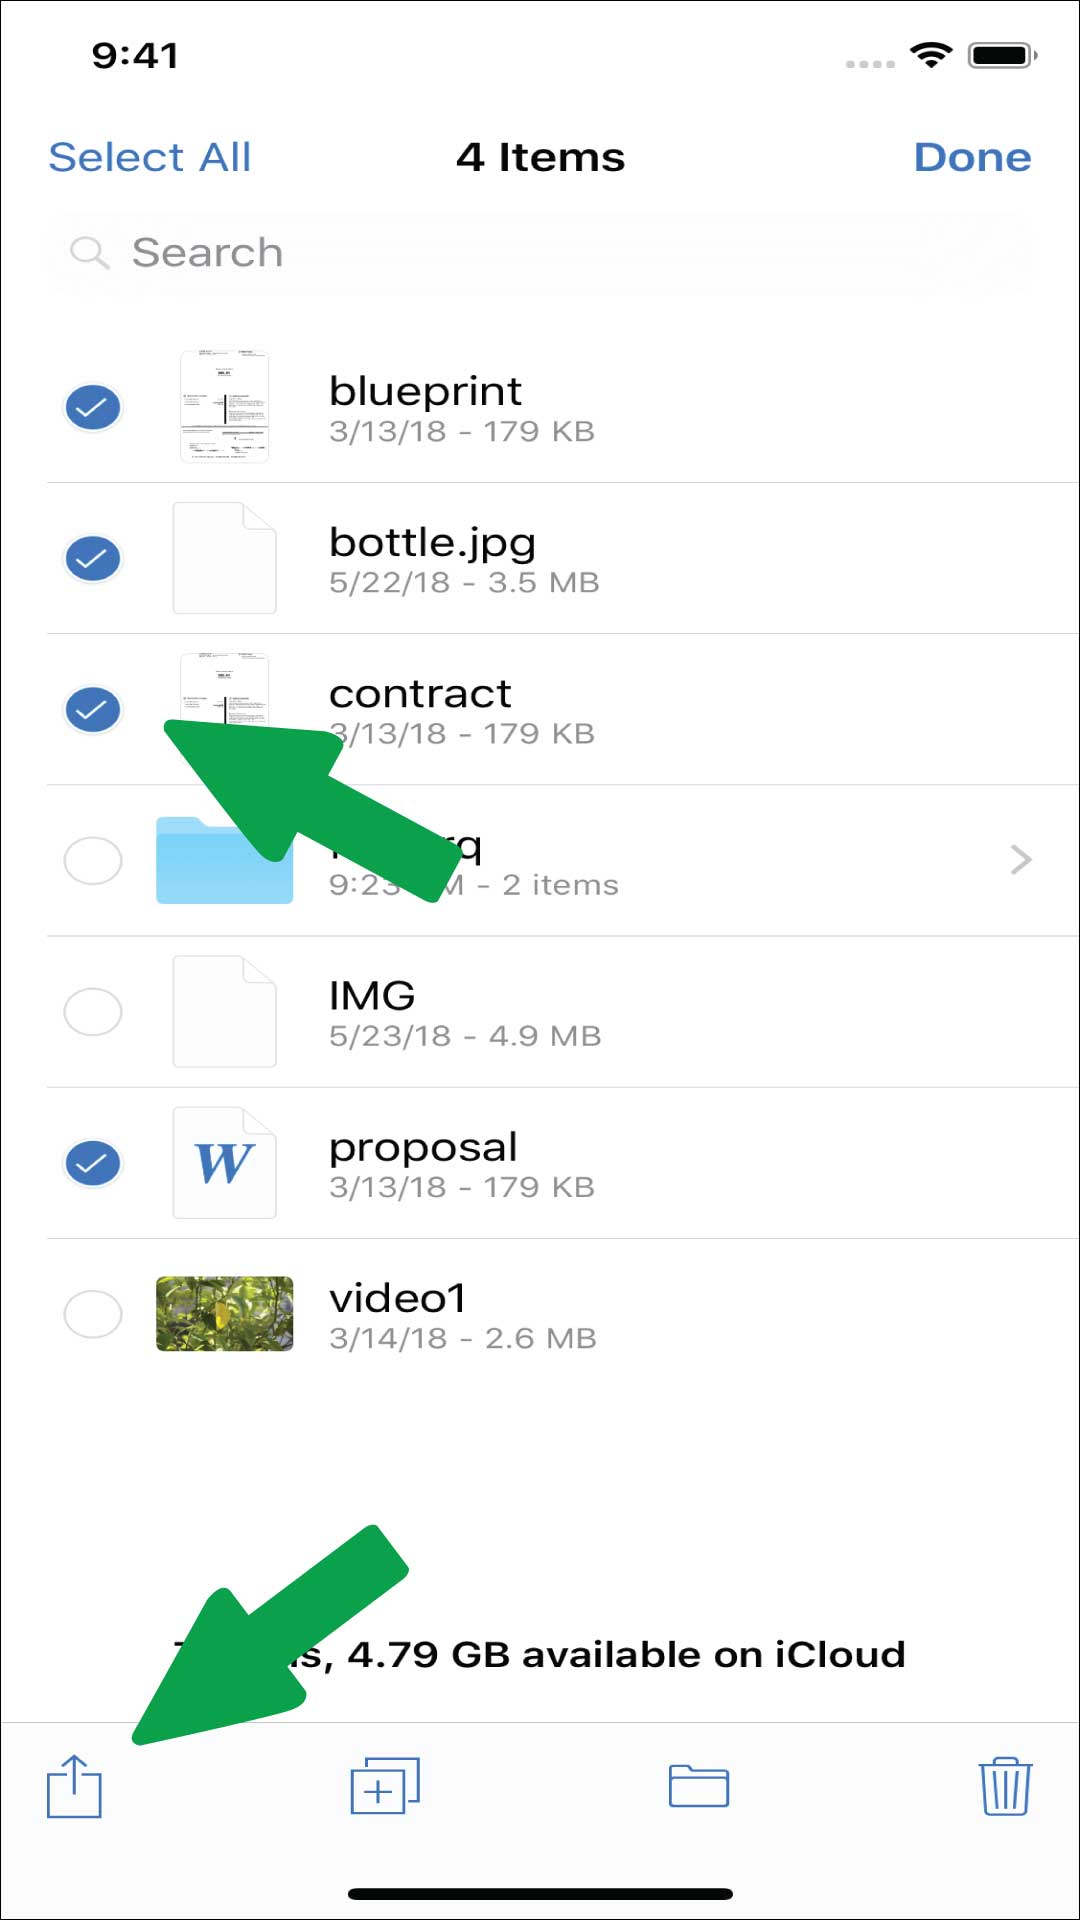
OUTSIDE - STEP 3
From within your iCloud, select the files you want to encrypt and/or import.
Select to Share the selected files.
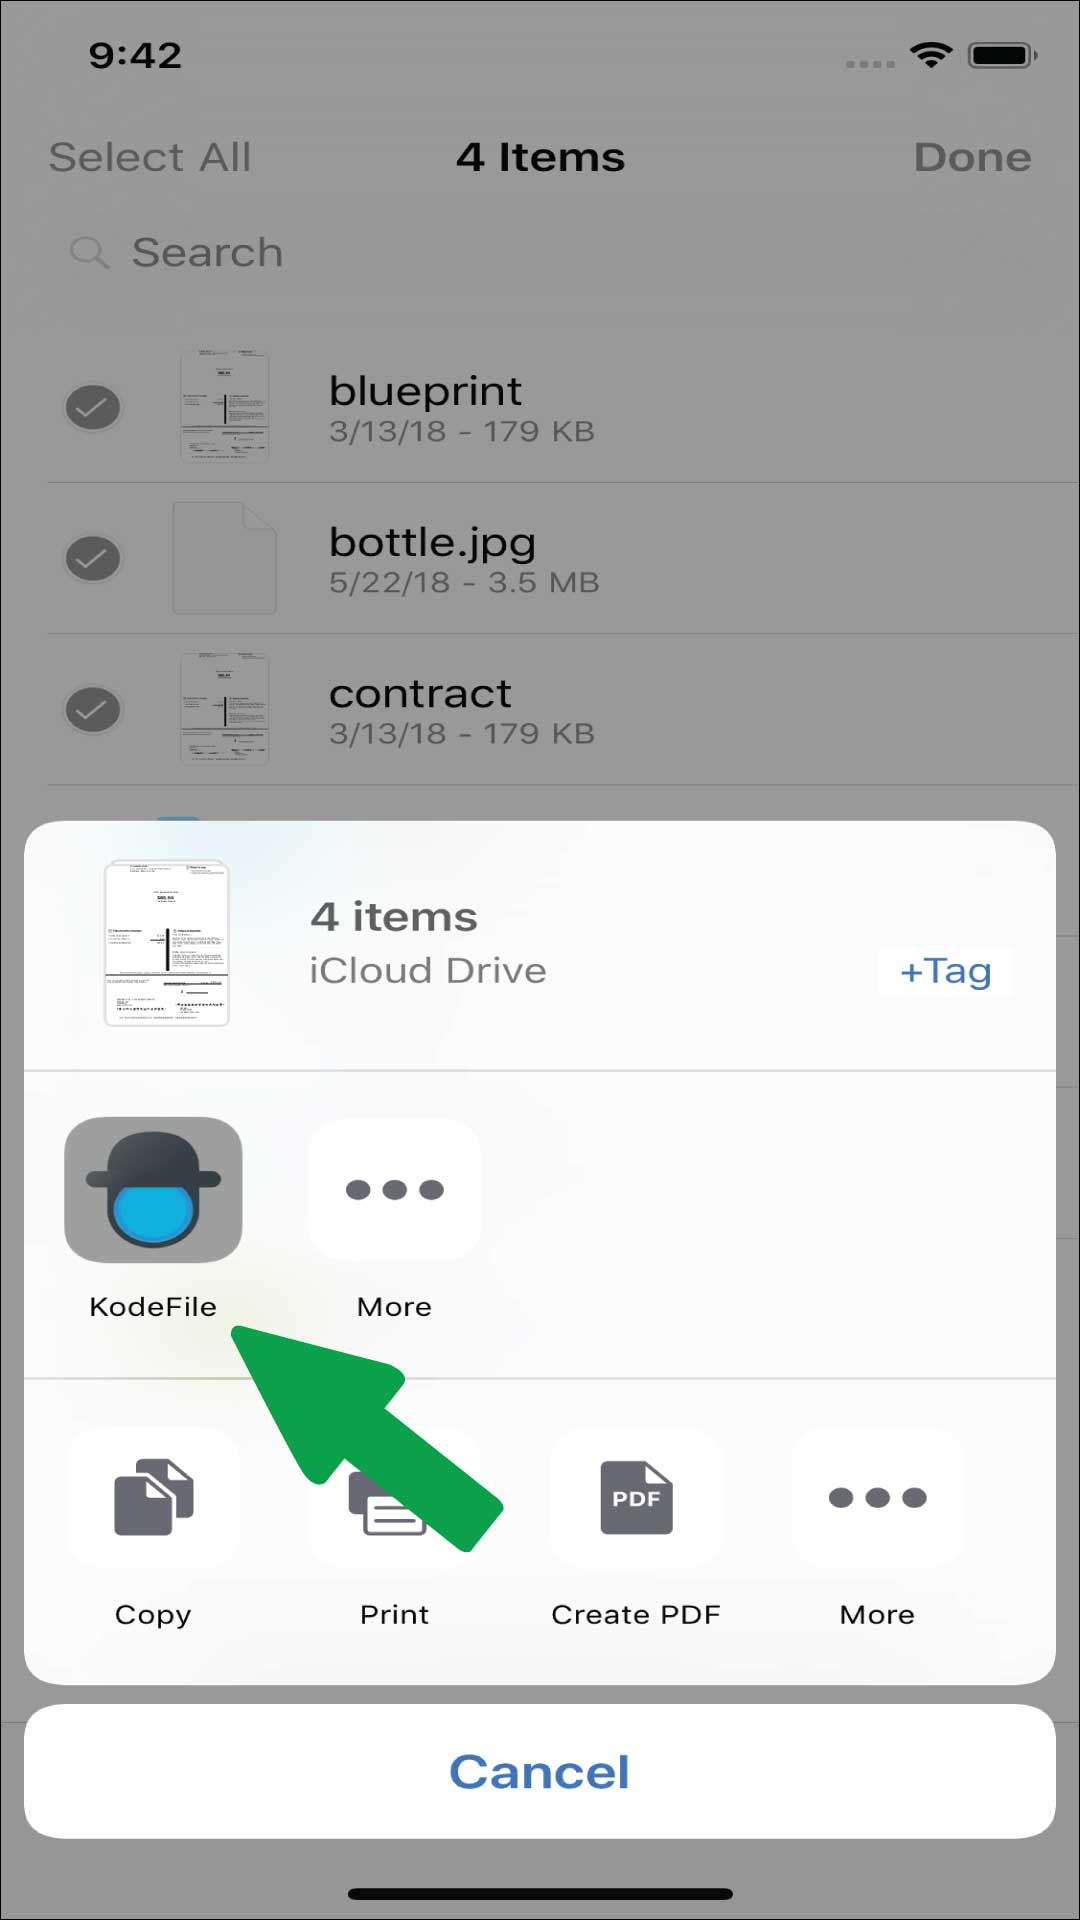
OUTSIDE - STEP 4 & 4.5
From the list of apps available to share the files, select KodeFile.
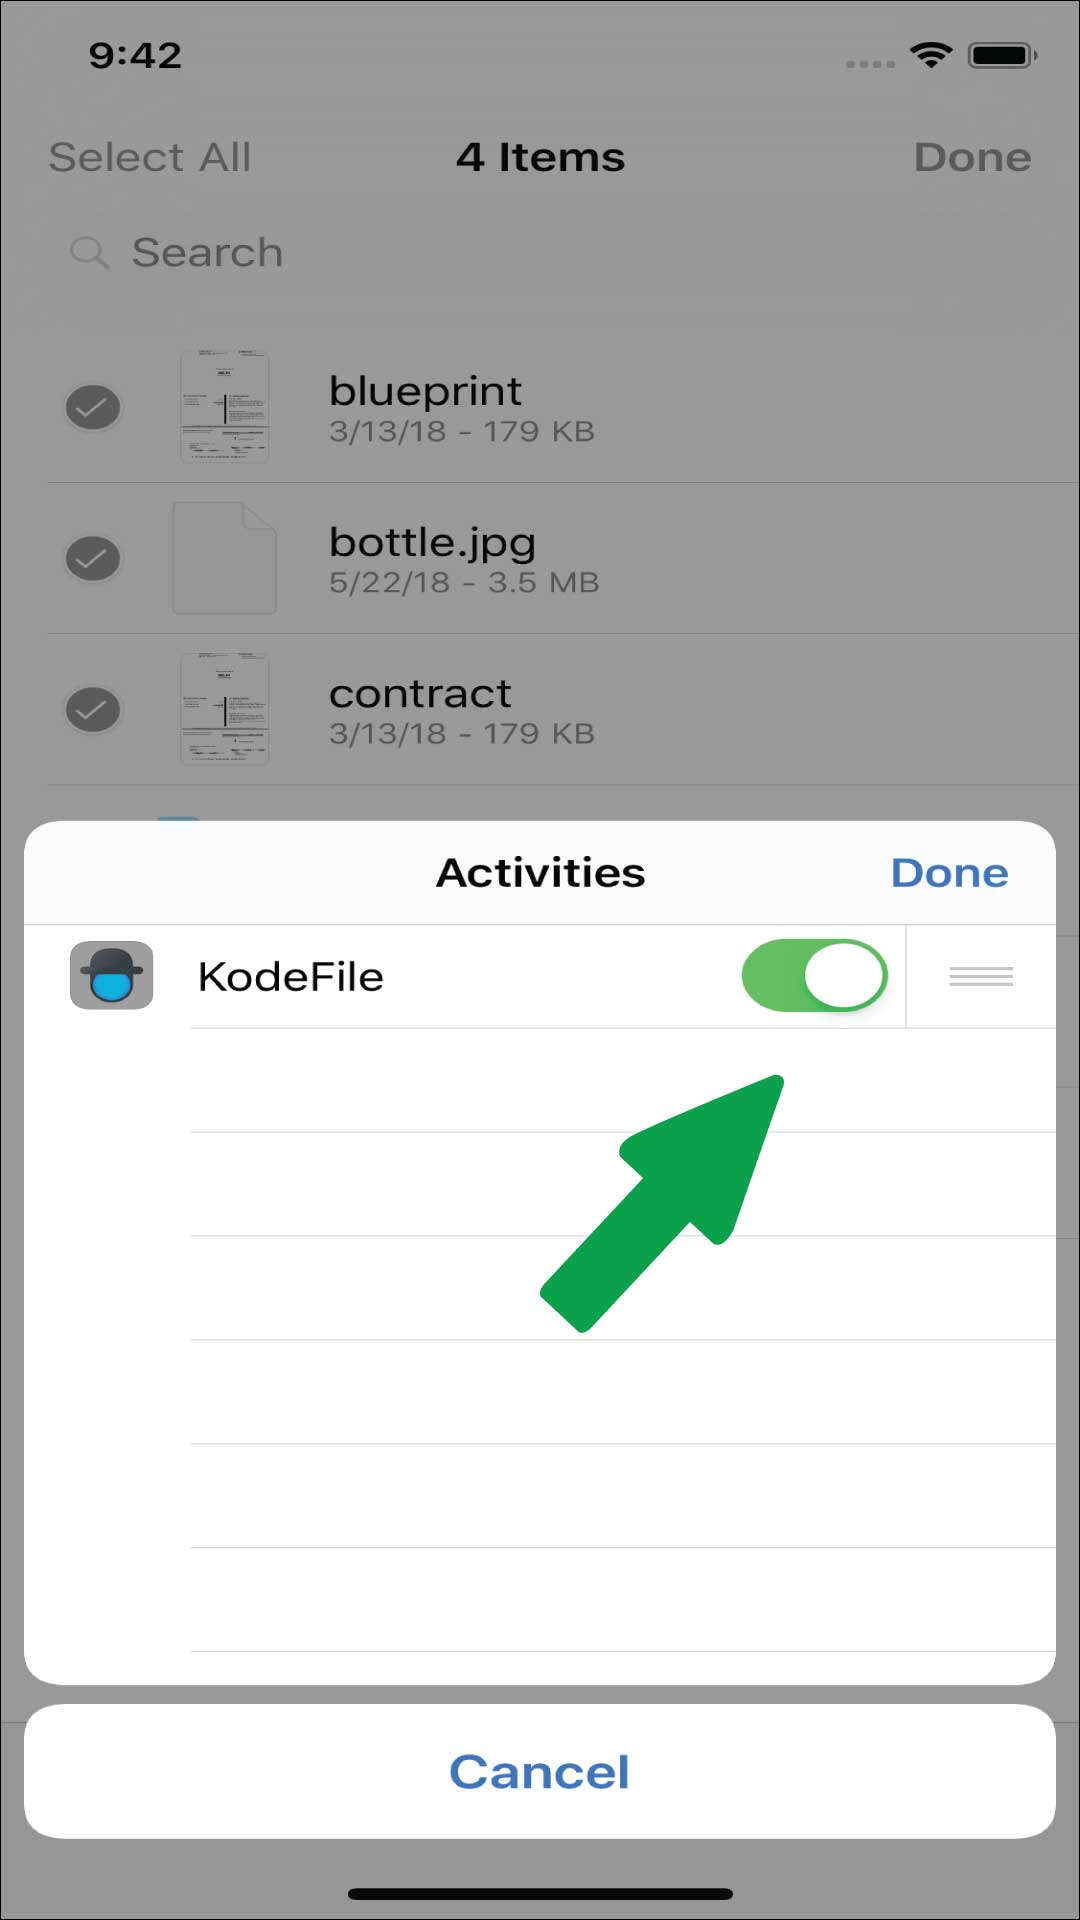
If you don't see KodeFile as an option, click the "More" button and activate KodeFile as an Activity. Then you will be able to share with KodeFile.
OUTSIDE - STEP 5
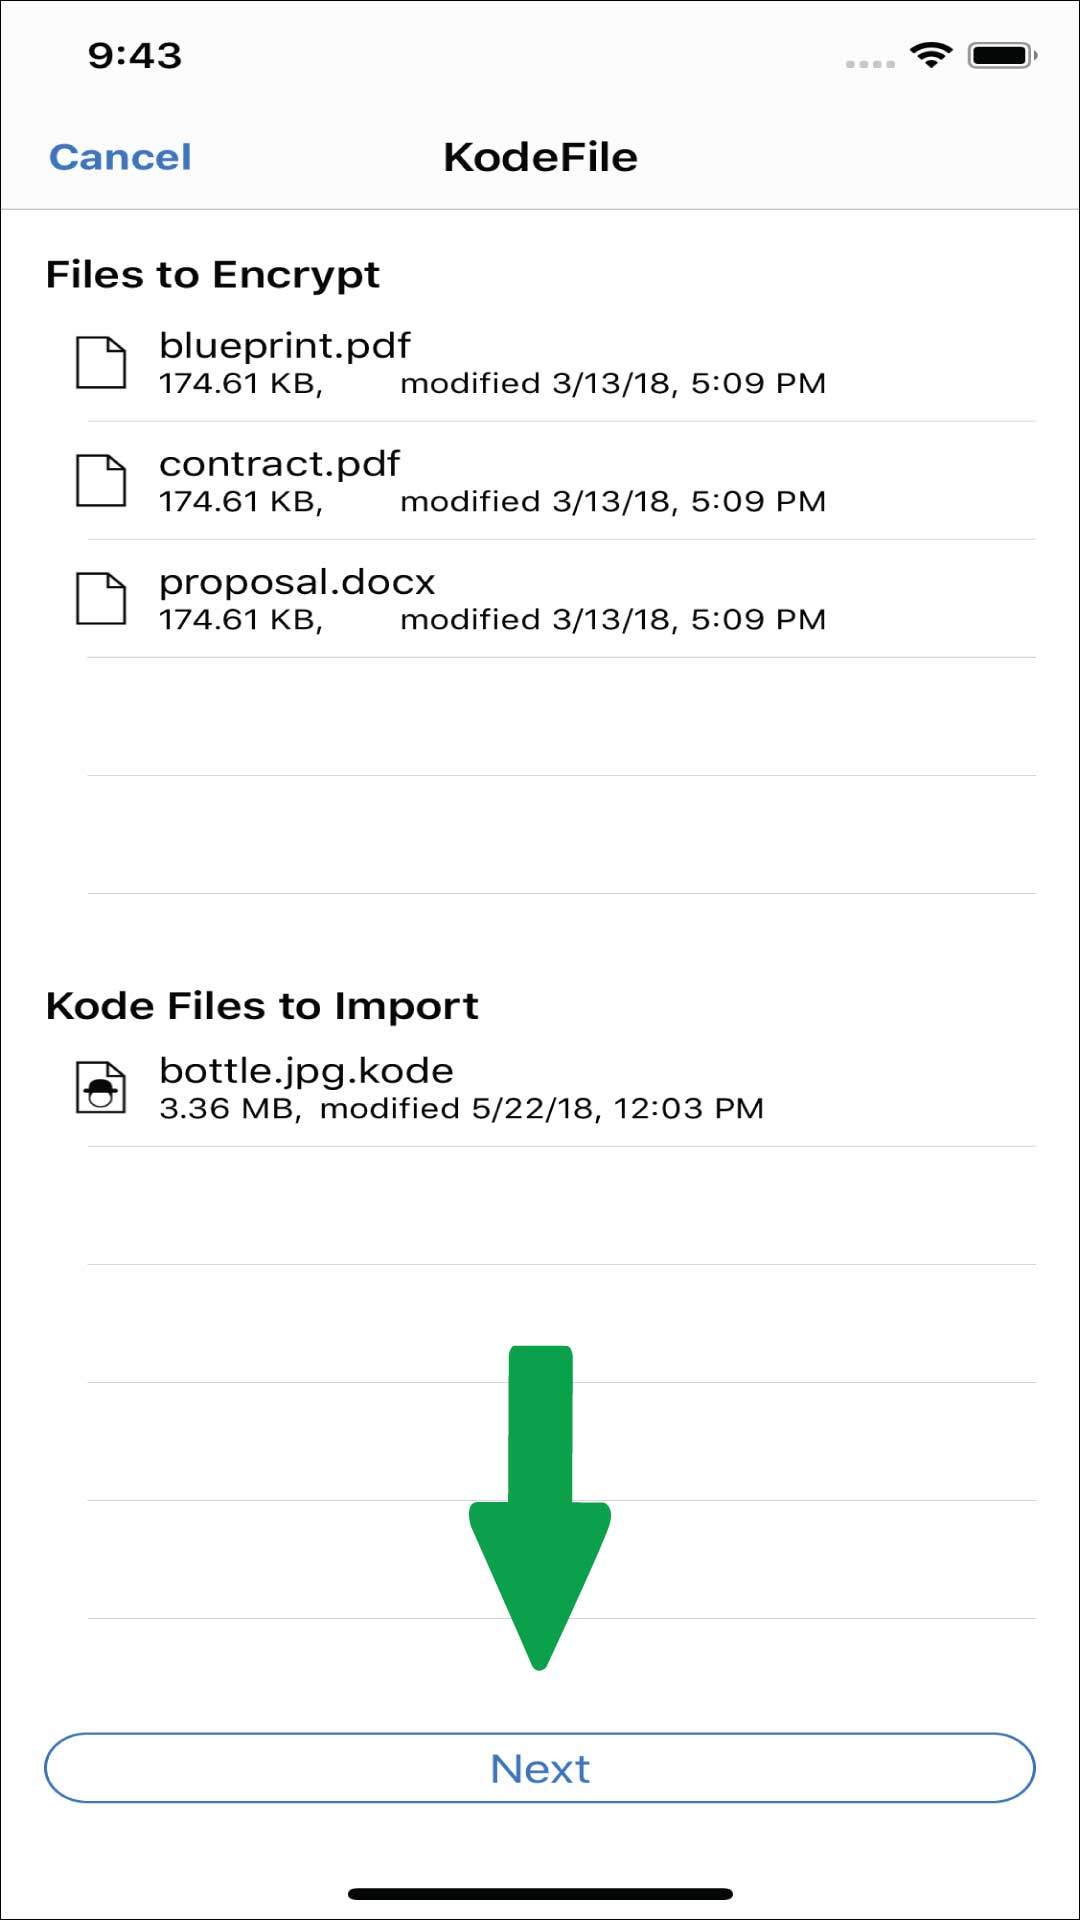
KodeFile launches and displays a list of the files to encrypt/import. Press Next.
OUTSIDE - STEP 6
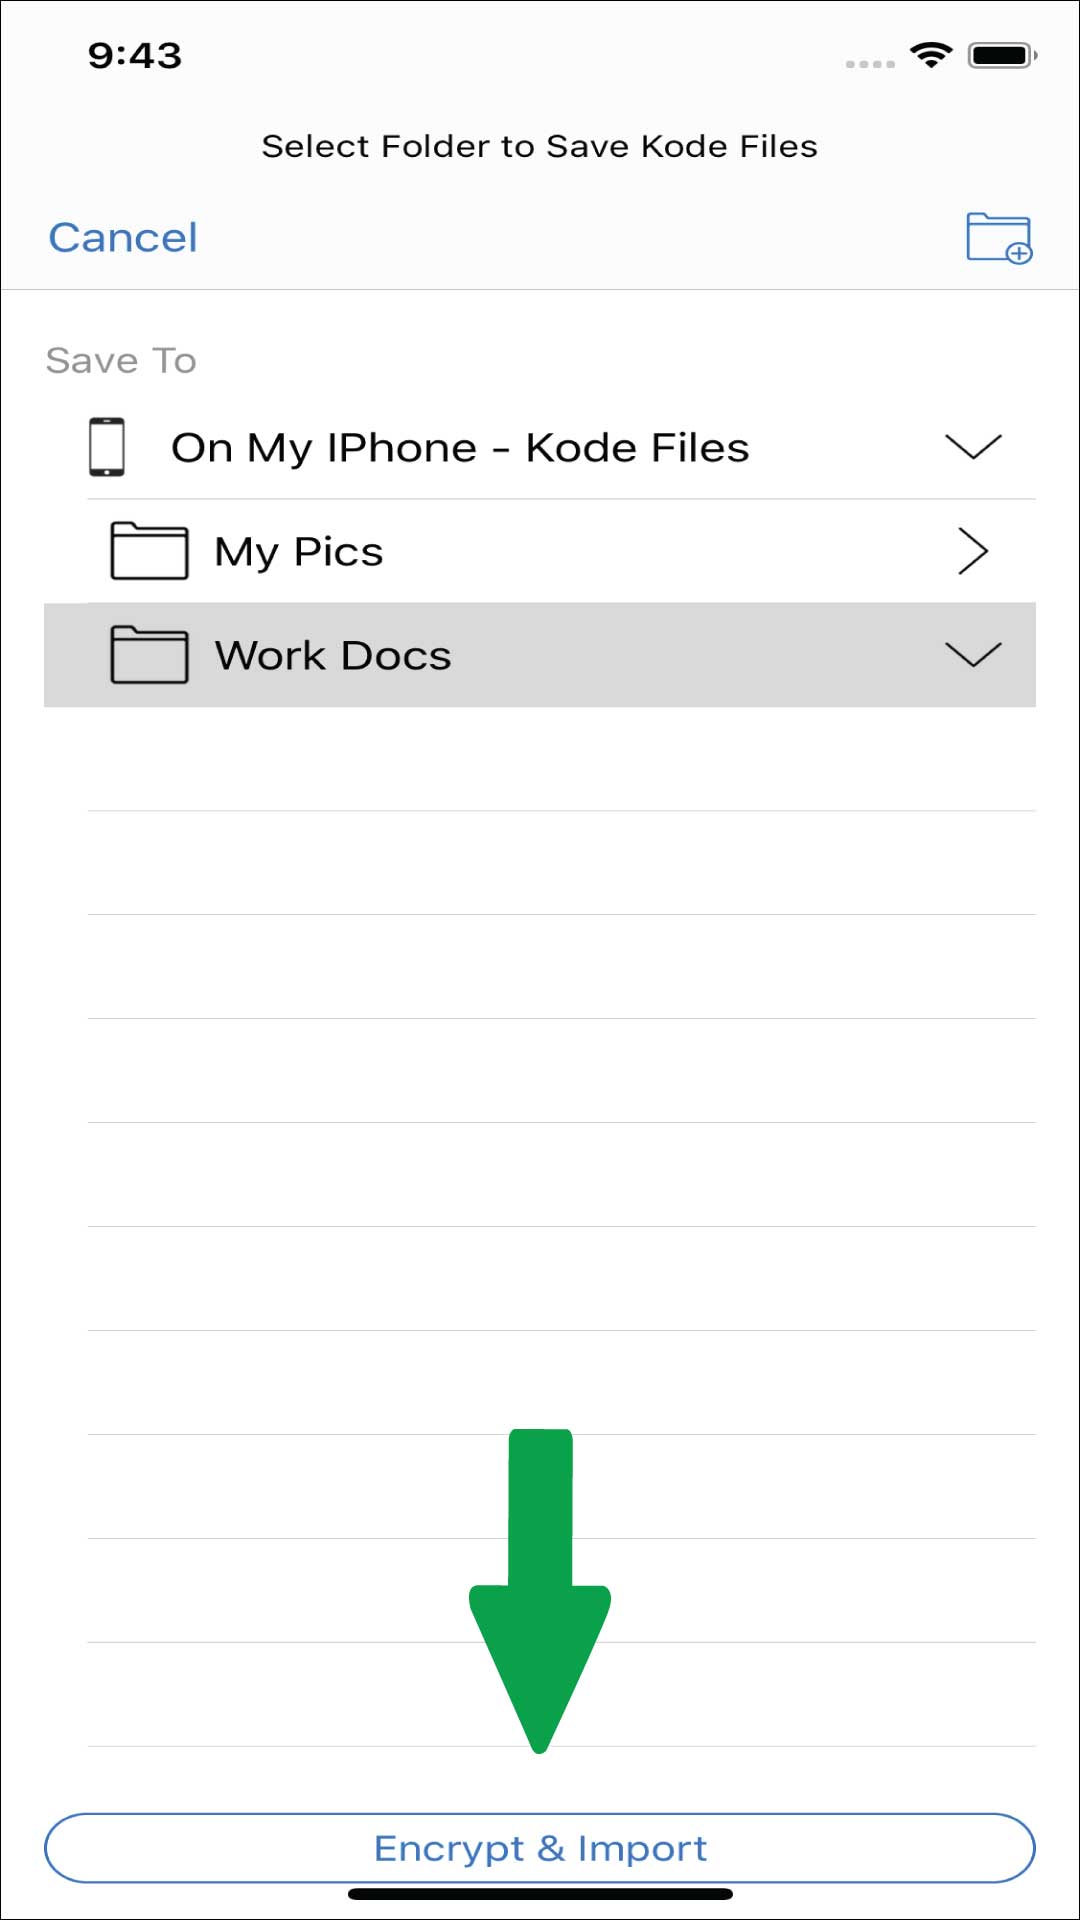
From the KodeFile directory screen, select where you want the files to be stored locally within the KodeFile app. Press Encrypt (Encrypt & Import).
OUTSIDE - STEP 7
After encryption, in Options, you can take actions on the newly encrypted files or Dismiss.
- Share Key: Launches your Confidants list for selection.
- Share Key and Email: Launches your Confidants list for selection. Then launches your email app with your chosen Confidant's email addresses pre-populated and the files attached.
- Share Key and Export: Launches your Confidants list for selection. Then launches menu of available apps and locations for exporting the files (cloud, email, etc.).
- Export: Launches menu of available apps and locations for exporting the files (cloud, email, etc.).
- Share: Launches menu of available apps for sending the files (cloud, email, etc.).
Step 1
Step 2
Step 3
Step 4
Step 4.5
Step 5
Step 6
Step 7
